Two photos of hay bales in a summer field. Both taken on Kodak HIE infrared film, developed in Rodinal 1:25:
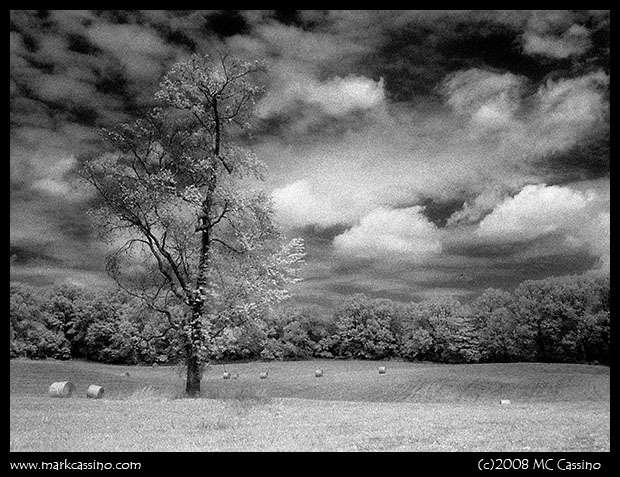
Two photos of hay bales in a summer field. Both taken on Kodak HIE infrared film, developed in Rodinal 1:25:
Where to go on a hot July afternoon? Find a shady spot, of course. That was my logic last Thursday, when I found myself back in a clearing in the Allegan Forest - off of a barricaded two track, off of some seasonal road, off of 122nd avenue, off of M89. It was a place I’ve never been to before – I need to find more spots like that.

You wouldn’t expect that I’d get tired of shooting dragonflies – it seems to take longer every season, but this week I finally lost the dragonfly vibe. Though the fields were teeming with blue dashers and more than a few skimmers of various sorts, I left the digital camera and the macro rig behind. I wandered back into the clearing with a trusty Pentax LX loaded with Rollei IR 400 film, a couple of zoom lenses, and an R72 filter.
I shot two rolls of the Rollei film – 72 frames, but with bracketing only about 20 different compositions. Digital has really spoiled me – I feel like I’ve wasted an afternoon if I don’t take 200 shots. That is one of the great perils of digital photography - you become your own army of monkeys, pounding at the shutter button. Accidental successes seem to be triumphs, but it’s hard to figure out how you got there and recreate the work. Not to mention that accidnets have no concept behind them.
Well - back to the fields and forest. I found a pearl in the sandy soil, often the case there.
This was my third session with the Rollei film. It was shot with the R72 filter, metered though the lens with the ISO set at 200 (thanks, Ray!) Film was developed in HC110, Dil H (1:66) at 20C for 24 minutes, with very low agitation (gentle agitation every 3 minutes for the first 12, then every 60 seconds.) I like it, but I don’t see it as a replacement for HEI. It’s much too slow with the R72 filter, and I really like using a plain red filter and being able to check and tweak the composition as I’m hitting the shutter button.
Rollei IR 400, with an R72 filter, is also a pretty high contrast film. Despite my attempt at using HC110 as a compensating developer, the film is a tough beast to tame with shadow areas virtually clear on the negative. But, when it comes to B&W shots, contrast is your friend. Not a friend I’ve really come to terms with, but working with this film has been a big boost in helping me understand and work with higher contrast mono shots.
Six months ago Maryellen Hains pulled together a diverse group of local artists and proposed a show themed around the number seven. After a bit of reflection, discussion, and some very tasty lunches at Hunan Gardens, the group settled on the concept of working with the seven planets of the ancients.
The show was based around the concept of two artist first working independently on their pieces, and then coming together to create a collaborative piece.
Weaver Gretchen Hugget and I drew the planet Jupiter. While I was fascinated by the mythological and astrological aspects of Jupiter, I found actual images of the planet to be much more compelling.

And so I decided to create a photograph of the planet for my personal entry. A macro shot of algae floating on a mud puddle was the starting point – tweaking the color channels to turn green to blue resulted in a background that looked a lot like a starry sky. The denser part of the algae took on the form of a nebula, and the many air bubbles floating under the surface of the water took on the appearance of distant stars.
For the planet Jupiter itself, I took a bunch of photos of textures and colors and melded them together into a square tapestry. I more or less used things under the astrological rule of Jupiter to do this, drawing in the mythic and cultural aspects of the planet. After creating the square image I digitally transformed it into a sphere, and spent far too much time blending the layers and working on the shading and lighting effects.
The show opened this evening at the Carnegie Center, Three Rivers, Michigan. It’s simply smashing, if I say so myself.
Note: Additional development times (stand process in HC110) can be found towards the end of this post: Ludington Dunes.
A few months ago I ordered what will no doubt be my last rolls of Kodak High Speed Infrared film. It’s sad to see an old standby pass on, but while online buying film, I decided to pick up a few rolls of Rollei IR400.
I was looking for a film that could produce the same startling infrared affect that the Kodak film delivered. After shooting a couple of test rolls, it seems that the Rollei film is certainly up to that task. Here are a few first impressions of the film, plus tips regarding exposure and development.

Exposure: Without a filter, or with just a #25 red filter, setting the ISO to 400 and metering through the lens worked fine. As with most ISO 400 films, though, I prefer the results at ISO 320 or even 200.
As you’d expect, there is no IR effect when shooting without a filter. And, unlike some other IR films, there is very little IR effect when shooting with a #25 red filter. To get a pronounced IR effect I had to use a Hoya R72 infrared filter.
My first experiments with the IR filter were disappointing. I utilized a 5 stop filter factor, so I metered at ISO 400 with no filter and then increased the exposure by 5 stops – effectively shooting at ISO 12. I bracket up and down a stop, for ISO 24 and 6. Unfortunately, with the R72 filter in place, this still resulted in a grossly underexposed negative.
So the second time around I ramped up the filter factor to 7 - 10 stops – shooting at ISO 3, 1.0, and even 0.5. The shot above was metered at ISO 1.0 and was taken with the R72 filter in place. In bright midday full sun, with the lens at f16, this was a 1 second exposure – pretty darn long and comparale to the digital IR work I’ve been doing. (Just to be perfectly clear for folks trying to wrap their heads around adjusting exposure to compensate for filters – I metered the above shot with the camera set to ISO 400. That gave me a recommended setting of 1/500th of a second. I then clicked the shutter button to increase the exposure by 9 stops to 1 second even.)
The R72 filter was critical for getting the distinct IR effect. The image below compares two shots, one taken at ISO 200 with a #25 Red Filter, and the other with the R72. While Kodak HIE, Ilford SFX, and even the now long defunct Konica IR750 all produced good results with the plain red filter, with the Rollei film the red filter just doesn’t cut it. The technical specifications sheet recommends a deep red filter, but I have not tried that.

Development: Having only shot two rolls of this filme, I processed the first in Rodinal 1:50 and the second in HC110 Dil H (1:66). The roll dipped in Rodinal was grainy – very grainy. The HC110 roll had much more subdued grain, and much better tonal range (of course, that is also a result of the second roll being better exposed.) The successful process with HC110 was 20 minutes and 20C, with agitation one per minute for the first 15 minutes, and every 30 seconds for the last 5 minutes. For the next roll I’ll probably drop the agitation for the first few minutes, and extend the time, in hopes of coaxing out a bit more shadow detail.
Rollei IR400 is the first 35mm film I’ve used that has a water soluble anti-halation / dye layer. While this is generally the rule for 120 and 220 films, I wasn’t expecting it in a 35mm format. As recommended on the Massive Development Chart, I pre-soaked the film for 5 minutes before developing .
In conclusion, I’m really happy with the rest results from this film, and am looking forward to doing more work with it.
It’s been over two weeks since I returned from visiting northern Michigan, but it was just a few days ago that I finally developed the two rolls of film that were exposed in a converted Kinoflex TLR. Background here: we were driving up north on World Pinhole Photography Day. I stuck the Kinoflex in the back seat of the car, hoping for a chance to pull off the road to snap a few shots.

I first broke out the pinhole camera in Kalkaska, Michigan. We were heading into trout territory, and trout fishing is a major passion in Kalkaska. The city hosts the National Trout Festival on opening day of the trout fishing season (which happened to be the day we were passing through.) A large fountain featuring an enormous brook trout sits smack dab in the middle of the city, and driving through we stopped and shot the better part of a roll of 120 film of the fountain.

Nice enough subject matter, but I really wanted to get a landscape shot. After we reached Boyne Mountain and checked into our lodging, we ventured back to the Deadman’s Hill overlook. The late afternoon sun played over the flowering spring trees – just starting to show the first hints of season’s foliage. The sun reflected off the Jordan River, making it a bright ribbon in the valley below.
Personally, this is my favorite pinhole shot from this trip. The sun was shining obliquely into the pinhole camera, and the ‘pinhole flare’ adds a little to the shot as well. Now I just have to resolve to use the pinhole camera more often, and not just on Arbor Day!
Spring is hiding this April – lurking in the melting mounds of snow that shrink at the edges of parking ramps, under the brown grasses and leafless trees, in the cold rain that falls more often than not. Now wildflowers are blooming – yet. Few insects take to the air. A few green buds hint at what is coming.
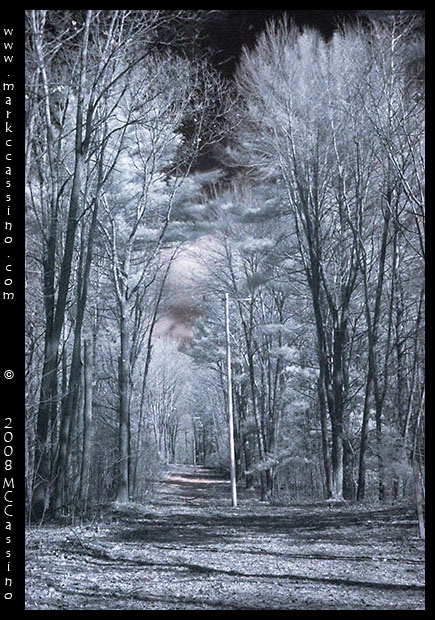
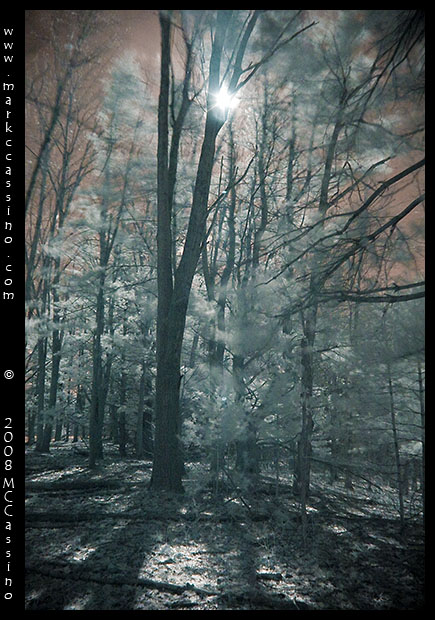
Late last week, though, the sun shone brightly and temperatures rose enough to melt most of the remaining snow – except in the shaded places. I went to the Allegan Forest to see if I could coax out some glimmer of the hidden season with an infrared photography session. What better way to search for something hidden, than to look with invisible light? Or so goes my logic, or whatever.
At least the melting snow let me get at areas that have been difficult to reach these last few months. First off was a visit to the vernal pond – more like a vernal marsh – off 48th street. Beginning in a few weeks and then for the rest of the summer this place will be full of all sorts of dragonflies. This is the time of year when the marsh is the most flooded – this shot below shows (in graphic infrared hues) the flooded out and trampled down grasses that will rise up 4 or 5 feet out of the marsh by late spring. By July or August I’ll be walking through the area shown here – the marsh will shrink down to just a small wet area (the heart of the marsh) by the end of the summer.

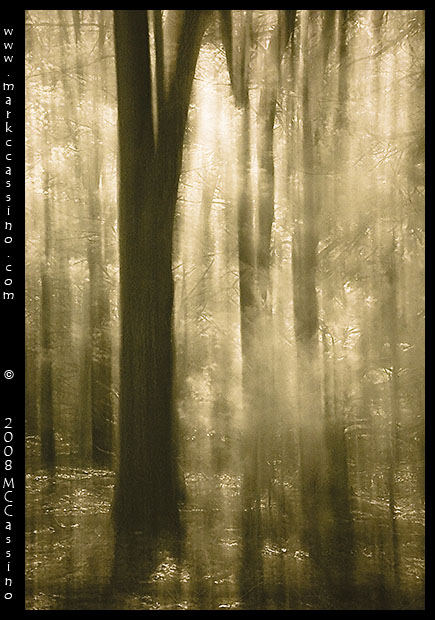
But surely dragonfly larva slink through the icy waters, even now, dreaming of the days when they will take to the air…qq I also visited some areas north of the river – along the bluffs rising above the flooded flood plains below. In particular I explored a steep embankment off 125th street – which is a rutted two track at that point. The steep slope faces due south, and the first hepatica leaves, and even a few flower buds, were poking out of the dried leaves. The micro climate at this place makes it green up earlier than anywhere else that I visit, so in a week – maybe two – the hepatica should be abundant elsewhere.qq Here’s another infrared shot from the same area – this one of a pine tree, somewhat close up, though not a close-up. Not much to say, but I like it.

All of these photos were taken with the Pentax *ist-D and an RM90 IR filter.
I also experimented with Rollie IR400 during this trip, shooting alternatively with an R72 IR filter, and a standard #25 red filter. The first time out with this film was not so successful – none of the shots with the R72 filter came out well, and the shots with the standard red fitler show little IR effect (though as a standard B&W film it looked fine.) The shots with the R72 filter were metered at ISO 25, and were bracketed one stop plus and minus. In hindsight, I realize that I should have metered at ISO 12 or even 6 – so I’ll be back to try again. I also underdeveloped the film – which did not help things.
Well – let’s hope I got all the mistakes out of the way on this first try. With 4 more rolls in the fridge, I’m eager to give this film another try. In the meantime, here are some other digital infraed images from this spring:

It’s been a slow winter so far. It has snowed like crazy here in west Michigan, but the snow has always been sleety, windblown, dry bits of dust – no fine individual crystals. The counties to the west of Kalamazoo have been hit with the most snow – and the Allegan Forest is now blanketed in white. There is at least 3 feet on the ground, and the small two tracks and seasonal roads that lead to the great places are impassable. I’ve tooled around on the main roads, but the landscapes haven’t come together.
So instead of taking new shots, I’ve been re-working old ones. The Signature Artist Cooperative has a group show coming up, and the theme is simply “The Elements.” So I’ve been readdressing this theme, and here are four new digital abstractions addressing the elements as understood by the ancients - Earth, Air, Fire, Water.
Each of these images started out as a digital photo. But I decided to pull out the plugs and use some of the digital manipulation techniques I’ve been experimenting with these last few weeks. Here’s a run down of the images and techniques used to make them.

Earth. This is the most representational of the images. It started with a shot of leaves decaying in my bird bath. Correcting for the glare of the water created an usual tonal quality for the source image. I ran the source image through an old, 16 bit graphics program, which pixilated and distorted the image. (See the prior post on digital abstractions for more on this.) Unlike the other three images in this series, there was little layering in Photoshop, except for tonal corrections and adjustments. I spent a lot of time drawing on the image, using the dodge and burn tools, to selectively enhance specific details in the image. This image, more than any of the others, looses a lot in small web size, since the pixilation is condensed down and blurred together.

Air. The source photo for this was posted here in May, 2006 – it was a light bulb that had blown out, leaving a layer of soot inside the bulb. The image was inverted and the color tone was adjusted to the blue hue shown here. As with Earth, I did a lot of “painting” with the dodge and burn tools. In particular, I made adjustments to individual channels, bringing out some reddish tones and suppressing some of the flare in the corners.

Fire. This began as a controlled motion blurred shot of a trail running through cool green trees. After inversion, color adjustments, and some work with the sharpening filters to bring out the charcoal like textures in the shadows, I over layered some purely digital color patterns to bring out more orange tones. This image started out way too magenta , and as I worked with it I realized that fire is more orange and yellow than blazing red.

Water. This was the last of the images to be completed. It started with a reflection of the sky in Lake Michigan. That image was turned upside down, which distorted the perspective. A couple of grayscale digital gradients and texture layers were laid over that. Initially the color was too blue – too much like Air – so I swapped the blue and green channels to get the aqua green tone shown here.
You never know if you really like an image until you’ve looked at it for a while – but for now I’m happy with these four images, interpreting the theme of The Elements.
Prints of these images will be displayed at the Signature Artist Cooperative Exhibition entitled “The Elements.” The Exhibit will be at the Art Center of Battle Creek, 256 Emmett Street, Battle Creek, MI 49017. The exhibit will run from April 2-26, 2008.
When making photographs there is an undeniable desire to take control of every aspect of the process. Digital photography has enabled us to control our work with mathematical precision – heck, since a digital photo is, in essence, a mathematical table, it’s chid’s play to add here, subtract there, averge across this range or that…
At some point I find myself yearning for just a bit of randomness to creep into the process. Maybe that’s why I keep playing with film – no matter how carefully you work, there’s no way to precisely control each and every step – how much did that stock solution oxidize since it was mixed? Just how did the solution flow in that last tank inversion? Just how old is this film and did it change in the last few hours, sitting in my warm pocket?
The quest for the infusion of randomness is, for me, a major allure of toy and junk cameras. Come on – it’s all random when you can’t control exposure or focus! No need for subtlety here…
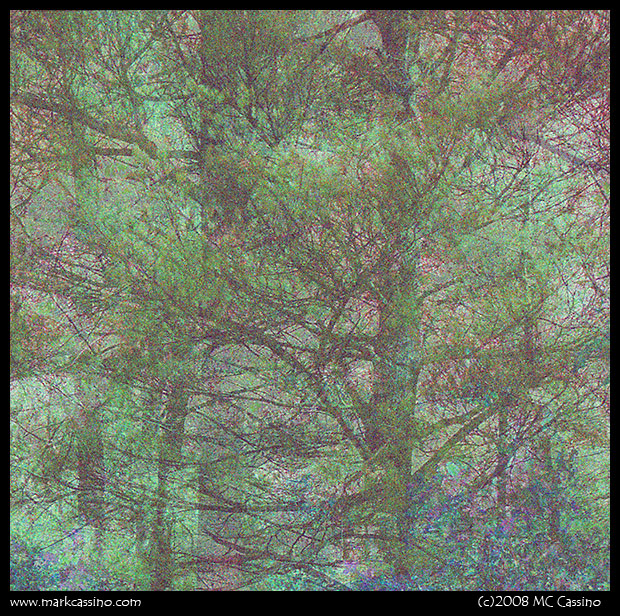
The quest for randomness has sent me looking into many peculiar places – but here is one that is perhaps the strangest of them all: my own computer.
Of course, computers and their software, soulless things that they are, are incapable of truly random actions. They can emulate randomness by tapping into tables of pseudo-random numbers, but that’s it. Pseudo-random means that the lists of figures were once, indeed, random, but have since been frozen in fixed sequence and by that are now locked in relationship with each other, and are therefore not random. Though they are probably arbitrary.
So how can you get randomness out of one of these bit boxes? Well, there’s always software malfunctions…
I recently discovered the wonderful world of software emulators. DOSBOX is a favorite – fire it on top of WindowsXP or Vista, and it does a great job of emulating MS DOS from days gone by. I even unearthed my old Windows 3.1 disks, and installed it in the DOSBOX session. “Wow,” I thought, “I can finally get Kai’s Power Tools 2.0 back up and running…” and so that lead to installing Micrographix and the Kai’s Plug Ins.
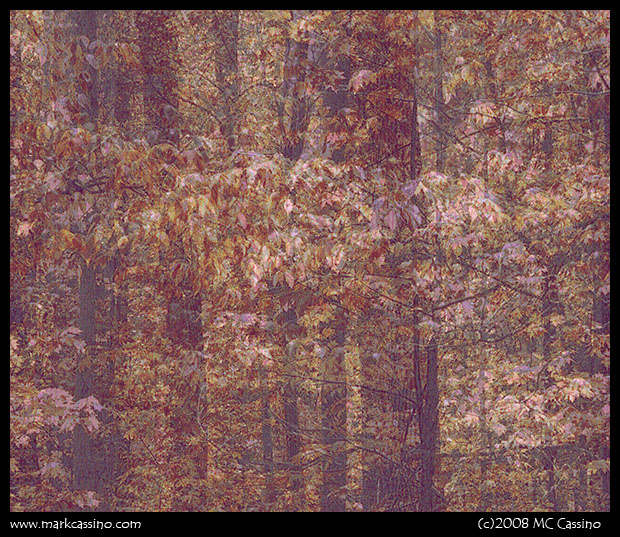
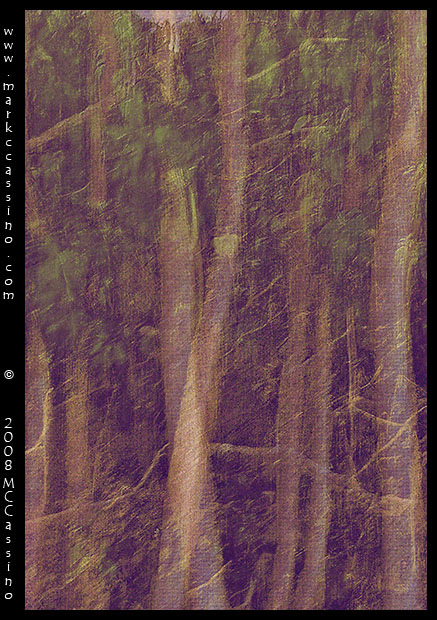
And that’s when randomness took over – seems that Micrographix doesn’t know what to do with a 16 bit TIFF, and Kai’s has a hard time with files beyond a certain size. But it’s what Micrographix does with those 16 bit files that’s really interesting. It seems to dither them, fold them, crop them, chop them, and otherwise mess them up. So I immediately started throwing all sorts of photos at it, just to see what will happen…
Well, I like the effect. Pictures of trees seem to work the best – lots of trees, that look good when layed on top of each other. As with a lot of this stuff, a little goes a long way, and after looking at the lot of them for a while only a few remain interesting. But – here’s another interesting trick to play around with.