I’ve been shooting a lot of infrared these days, and feel that some of my best recent work has been accomplished through the use of digital infrared techniques. This is a fairly new technique for photography – up till recently infrared work was done on film. So here’s a tutorial that covers the technique that I use to create infrared images with my Pentax *ist-D.
I should start out with the caveat that there are many different ways to take digital infrared photographs. The technique I use is one that I more or less stumbled upon by happen chance – I happened to acquire an infrared filter, and chanced to use it on the *ist-D in a way that worked. But different digital cameras have different sensitivity to infrared light, and there are many different types of infrared filters out there that, for all I know, might work better than the Hoya RM90 filter that I use. So, as the saying goes, your mileage may vary.
So just what is infrared light anyhow? The technical definition is that it is electromagnetic radiation close to but outside of the visible light spectrum. Infrared light is just beyond the red end of the spectrum of visible light – meaning that IR light has a longer wavelength than visible light. To get even more technical, the human eye can see light in the (approximately) 400 – 700 nanometer range. Infrared light lies beyond that, consisting of frequencies of 700 to 1000 nanometers.
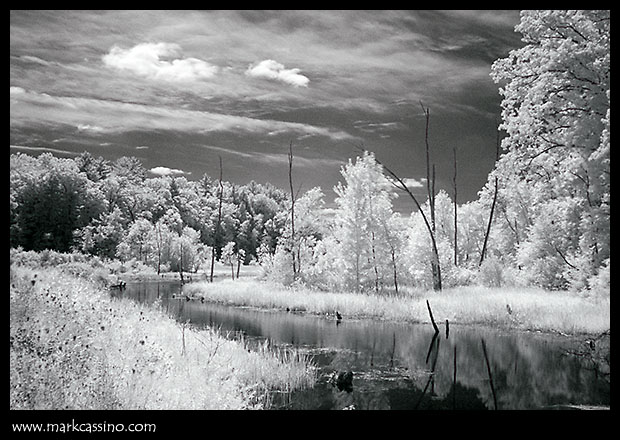
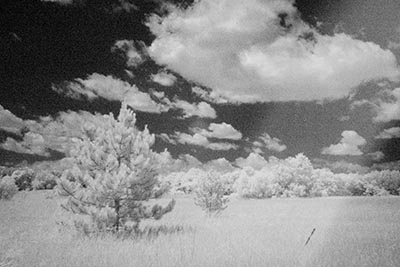
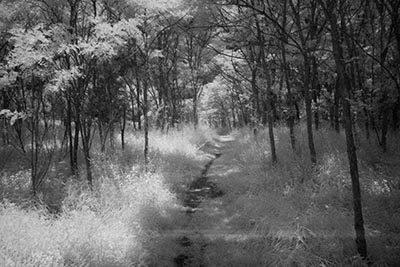
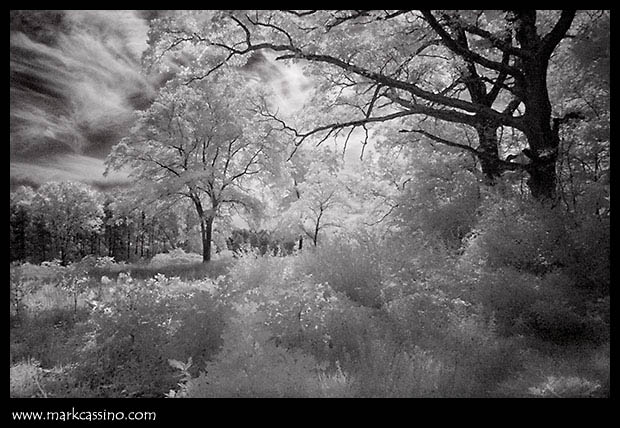
The characteristics of infrared light contribute to the look and feel of IR photos. For example, due to the long wavelength of IR light, it is less prone to be dispersed by airborne dust particles. As a result, a clear blue sky will appear deep black in IR shots. IR light also reflects off foliage, resulting in what Ansel Adams described a “plaster white trees” in infrared photos.
In general, infrared photography is best accomplished on bright, clear days. Due to it long wavelength, infrared light can penetrate some barriers – like haze – but also can be blocked completely by others. After doing a lot of IR shooting, both with film and digitally, I still find it very difficult to predict how certain scenes – especially when shooting under foliage – will come out.
The CCD or CMOS sensors in digital cameras are generally sensitive to infrared light, but they also have infrared blocking filters incorporated into their design, apparently so the IR light will not interfere with normal photography. While you can have the IR filters removed from you digital camera, this will render the camera pretty much a dedicated IR device. Some day, when my *ist-D is obsolete for regular shooting, I plan to take that approach. But in the meantime I prefer to work around – or perhaps through – the build in anti-infrared filter.
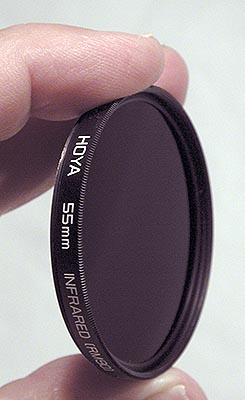 To do this, I use a Hoya RM90 infrared filter. This filter allows transmission of light from the (roughly) 750 – 3000 nanometer range. (There is actually diminished transmission of frequencies out to ~4700 nm.) This is the heart of infrared, and completely outside of the visible light spectrum. In fact, as shown by the image of the filter, the glass in the filter is jet black. So once it is attached to the lens, you are truly working with ‘invisible light.’
While the *ist-D has a built in infrared blocking filter, it is not 100% effective. For my infrared work I frame up the shot, attach the RM90 filter, and set the camera to manual mode. The camera actually reads and responds to the IR light passing through the filter, and the meter shows an exposure setting and the autofocus works quite well.
The ability to have autofocus through the IR filter is a real boon. Infrared light focuses to a different point behind the lens than does visible light. Good lenses (and most older lenses) have an IR focus guide on them. The idea is that you focus the camera using the visible light, and then adjust the focal point back to the point indicated by the IR focus guide. Since the *ist-D’s autofocus is working off only IR light, it focuses accurately right from the start.
The camera’s autoexposure meter, however, is not as accurate with IR light. In my experience, the camera will suggest and exposure setting that is at least 3 to 4 stops under exposed. You are also facing very long exposure times at high ISO settings when shooting digital infrared. My starting point, with the RM90 in place, it to set the camera to manual mode, and start exposures at ISO 1600, f16, 2 seconds shutter speed.
Depending on the actual lighting, the shutter speed at ISO 1600, f 16, can vary from 0.3 seconds to 15 seconds. While that may sound like an amazingly long exposure, it’s not that much longer than the exposures demanded by some IR films. The old Konica IR 750, for example, with a #25 red filter had an effective ISO of 6 (taking into account the filter-factor.) That’s about 1 stop from the starting point for the digital IR setup I’m using, and as Konica and all other film producers like to say when it comes to infrared – “bracket widely.”
The nice thing about shooting digitally is that you can look at the histogram and see how the exposure worked out. So, like I said I start out at 2 seconds, f16, ISO 1600, and see what the histogram shows. On a bight clear day that starting point will probably be over exposed, and on an over cast day that starting point might be a stop or two under exposed.
In any a case, forget about getting a histogram that shows a full tonal range from black to white. It just doesn’t happen – at least with my setup. Instead I get a compressed histogram, and a monochrome image. Once the photo is taken, a fair degree of post exposure processing remains to be done.
Here is a shot of “Thunderheads Over Mount Pisgah” – the first image (the magenta one) is the off the camera, unadjusted digital IR shot. The second image has been processed in PhotoShop.

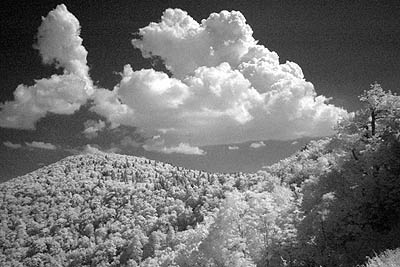
The post exposure processing is really pretty simple. The image first mush be desaturated (turned to B&W). The white and black points must be set to punch up the contrast in the image. After that, its just the normal routine of dodging and burning to get the look you want
There are still some pitfalls to the whole digital IR process. First off, noise can be an issue. A 2 or 4 second exposure at ISO 1600 is bound to be fairly noisy. I rely on the camera’s build in noise reduction to deal with most of this, and apply dust and scratches or other noise reducing filters as a last resort.
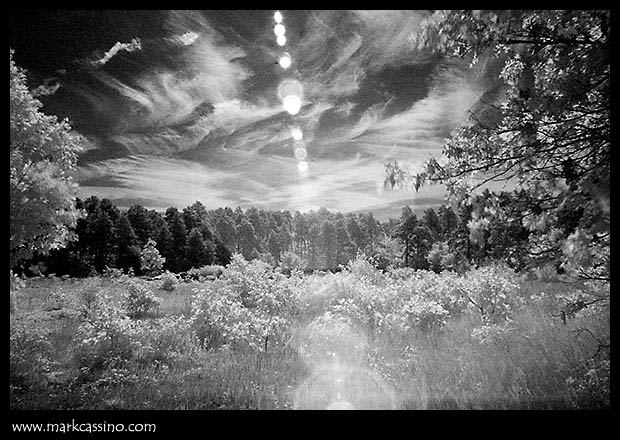
Second is the issue of sensor flare. This is where light bounces around or flares within the digital sensor assembly itself. Just like with lens flare, the result is a bright spot in the image. Here are two examples:
In the first one you can see a huge arch of flare cutting through the right side of the image. In the second you can a smaller line of flare running parallel to the bottom edge of the image, and just a short distance above the bottom.
I loose about 20% of my digital IR images to this phenomenon, and I’m not sure what exactly causes it. I do know that it seems to be related to the angle of the camera to the sun, and to either the length of the exposure or f stop setting. By opening up the aperture and using a shorter exposure, the flare usually diminishes or disappears altogether.
So to sum up the steps I use when shooting digital infrared with the *ist-D and RM90 filter –
1. Compose the shot with the IR filter off the camera (since you won’t be able to see through it once it’s mounted.) 2. Mount the IR filter, let the AF handle focusing (since it will need to adjust the focal point to compensate for the IR light.) 3. Start as ISO 1600, f16, 2 seconds. Look that the histogram and adjust as needed. 4. Process the RAW file by desaturating, and then setting the white and black points to compensate for the compressed tonal range. 5. Apply anti-noise filter if needed, and make normal image adjustments.
The really nice thing about digital IR is that, with the digital filter in the pack, you always have the infrared option open to you as a creative choice. That is something harder to achieve when dealing with finicky, perishable, and difficult to handle IR films!
3 comments
Comment from: ronnie standridge Visitor

Comment from: Bob Perry Visitor

very informative, thanks! But I do have one question concerning the histogram - what should it look like to ensure good exposure regarding the best possible IR imagery and the best results for editing?
Comment from: mcc Member

Hi Bob - You’d want the histogram to look like one for any other shot - avoid clipping but try to get it to cover the full tonal range. When using the technique discussed here I used to get pretty compressed histograms and would adjust in Photoshop. Avoiding clipping is the main thing.
I learned a lot comments.
TANKS